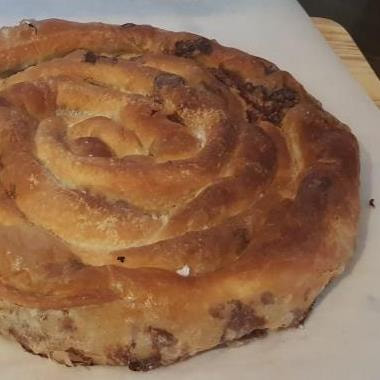
 "Burek je s mesom, sve ostalo su pite." (by every Bosnian ever) :-) Even-though spread across the Balkans this savory phyllo-pie is a Bosnian specialty. If you were ever in Bosnia you must have tried a Burek. They are sold in every bakery, on every corner across the country. There are many varieties of this pie and their name changes according to the filling inside (and your current geographical position). Here are some of the most common ones: Burek - filled with meat Zeljanica - filled with spinach and cottage cheese Sirnica - filled with cottage cheese, sour cream and eggs Pita od jabuka - apples and the list goes on.... We'll be doing couple of those here on bite&sip but let us start with meat! Time needed: about 2 hours Dough preparation and resting: about 1 hour Baking time about 40 minutes Ingrediens 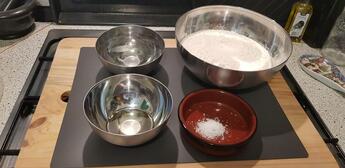 - For the dough 430 g all purpose flour (3 and 1/4 cups) 240 ml warm water (1 cup) 1 and 1/2 tbsp vegetable oil 1 tbsp white vinegar 1 tsp salt (+ some 1/2 cup of oil extra) 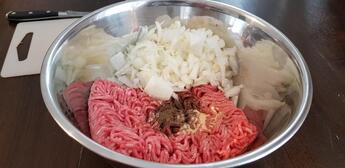 - For the filling 500 g of ground meat (1lb), we used pork and beef mixed 1 medium sized onion, finely diced 2 cloves of garlic, minced 2 tsp salt 1/2 tsp ground pepper Method 1. Put the flour and salt into the mixing bowl and combine. 2. In another bowl combine water and vinegar and add together with the oil to the mixing bowl. 3. Make a nice and smooth dough. You can make the dough by hand or use a mixer (mixing about 8-10 minutes). 4, Take the dough out of the mixing bowl using a dough scraper and put it on a lightly floured surface. 5. Dust slightly with flour and form a ball. 6. Divide the ball in two equal parts and form each one into a small ball. 7. Take some of that extra oil and coat the balls with it. Cover with clean film and a tea towel. 8. Let the dough rest for at least 30 minutes and up to 2 hours. *now would be a good time to make your filling 9. Prepare the table for the dough. Put a cotton tablecloth on your table an dust it with flour. This amount of dough stretches easily over a 150 cm x 150 cm (60 inch x 60 inch) table. 10. Take one ball of dough (keep the second one covered) and put it on the floured tablecloth. Using a rolling pin (or in my case a clean wine bottle because I don't have a rolling pin here) roll the dough out to about 3 mm thick (about 1/8 inch) 11. Using a brush, or simply the palm of your hand cover the surface of the dough with oil. Let it rest for another 5 minutes 12. After 5 minutes get both of your hands under the dough and with the back of the hand start slowly stretching the dough form the middle towards the outside. 13. Keep stretching the dough slowly on all sides until you can almost see through it. 14. Prepare your filling by combining all the ingredients in one bowl. 15. Spread the filling in small bits (about 1/2 tbsp large bits) across your dough. 16. By lifting the tablecloth roll the dough from two sides. This will leave you with a two rolls of dough in the middle of the table. 17. Using a sharp knife cut through the middle separating the two rolls. 18. Shape your dough rolls into a spiral and place in the baking pan. 19. Repeat the process with the second ball of dough. 20. Bake your Burek in a preheated oven at 200°C (400°F) for about 40 minutes or until golden brown. 21. When you take the baked Burek out of the oven give it a light brush with some more oil and cover with a tea towel for couple of minutes before serving.  Have a bite! Tips:
Resting your dough If you want to rest your dough for more than 2 hours (step 8) you can. Just make sure it is well covered and put it in the fridge. It can stay in the fridge for several hours, even over night. Before continuing the process make sure to take out the dough out of the fridge in time an let it come back to room temperature before continuing. Stretching the dough This part of the process seams a bit scary. I have never made this dough before. I usually go for the store bought version :-) Now was just the time to give it a go and try making the phyllo from scratch. By the time you get to the second ball of dough, you will have a sort of a feeling for it and the stretching will go much easier. And if you happen to have some holes in the dough - not important at all! When it's all filled and rolled up you won't be seeing any of those anyways :-) Vinegar There are many phyllo recipes out there. Most of them are with flour, water, salt and some oil at one point of the process. This recipe is my moms and she always puts a little bit of vinegar into her phyllo. It makes the dough much smoother and stretchier and really easy to handle. (btw. Mom would never use the mixer for the dough, she does it by hand) :-D
1 Comment
|
Categories
All
Archives
January 2021
AuthorMarijo & Hans 
|
 RSS Feed
